Introduction
As cloud storage of data becomes increasingly common, so does the need for data security. Data Encryption refers to the process of converting your data into a ciphertext so that only people (or groups) having access to a secret key or password can read or modify it. It is important to understand that data encryption offers a considerable defence in the case of attacks such that compromised data can only be read by authorised personnel.
That being the case as a data scientist, you might need to encrypt your data before uploading it to AWS S3 buckets. AWS offers broadly two types of encryption mechanisms: encryption in transit and encryption at rest (difference between data in transit and data at rest). As part of this blog post, we are going to look at encryption at rest and offer an easy way for a data scientist to encrypt/decrypt data through a Jupyter kernel whilst following best practices. Encryption at rest (AWS) can be done in four ways:
Server-Side Encryption (SSE-S3): Ask S3 to encrypt your objects (data) when you upload and then decrypt them when you download. It is totally managed by AWS and is the most cost-effective option.
Server-Side Encryption (SSE-KMS): Similar to SSE-S3, but in this case, you use AWS KMS service to manage your encryption via Customer-Managed Keys (CMKs). There are some additional benefits like audit trails that show when your CMK was used and by whom.
Server-Side Encryption (SSE-C): You manage the encryption keys and S3 manages the encryption/decryption when you access your objects. Keep in mind that AWS does not account for recovering, storing or managing your keys for this option.
Client-Side Encryption: You can use the AWS-KMS key or CMKs but you need to do the encryption/decryption yourself when you upload/download data. Also, make sure you have the key (and other necessary tools) to decrypt it when you download the data.
There are a few differences between these methods (in the area of ownership, the flexibility of use, and pricing) and this article provides an overview of them. However, in this blog post, we are going to focus on how to use Jupyter Kernels to upload and download encrypted data to S3 buckets for data scientists using SSE-S3 and SSE-KMS.
There are a couple of ways to do this encryption/decryption. Let’s assume you use Python to access data from S3 buckets. Then you could use the AWS SDK for Python (boto3) to do the encryption/decryption (one such guide). But this comes at a price. This would mean copying the contents of the file in the kernel memory at runtime and may not be ideal if your file size is quite large. In such a scenario we recommend using PySpark to do the encryption/decryption using spark runtime configurations. And here’s how you can do that.
Reading and Writing encrypted data
Setting up EMR configurations for encrypting at rest
Before cutting to the chase, let us pause a bit and think about what happens when we spin up an EMR cluster for a spark application. The cluster uses configurations that we have defined in order to set up the application. And in this step, we can specify the type of encryption algorithm (and encryption keys) during the instance startup. This will ensure all files handled in the EMR cluster (including uploading data to S3) that uses EMRFS will be encrypted with MyKMSKeyId. This can be defined as follows:
    aws emr create-cluster --release-label emr-4.7.2 or earlier
    --emrfs Encryption=ClientSide,ProviderType=KMS,KMSKeyId=MyKMSKeyId
Replace MyKMSKeyId with the Key ID or ARN of the AWS KMS that you want to encrypt with. You can also specify this option using the AWS CLI (more information about this), but keep in mind that you choose either but not both. Additionally, setting security configurations when you create an EMR cluster overrides the cluster configuration that we have set with the above command. An instance of how you can set up cluster configuration for encryption at rest is as follows:
    aws emr create-security-configuration --name "MySecConfig" --security-configuration '{
    "EncryptionConfiguration": {
        "EnableInTransitEncryption": false,
        "EnableAtRestEncryption": true,
        "AtRestEncryptionConfiguration": {
                "S3EncryptionConfiguration": {
                "EncryptionMode": "SSE-S3"
            },
            "LocalDiskEncryptionConfiguration": {
                "EncryptionKeyProviderType": "AwsKms",
                "AwsKmsKey": MyKMSKeyId
            }
        }
     }
}'
Writing encrypted data via the Jupyter Kernel
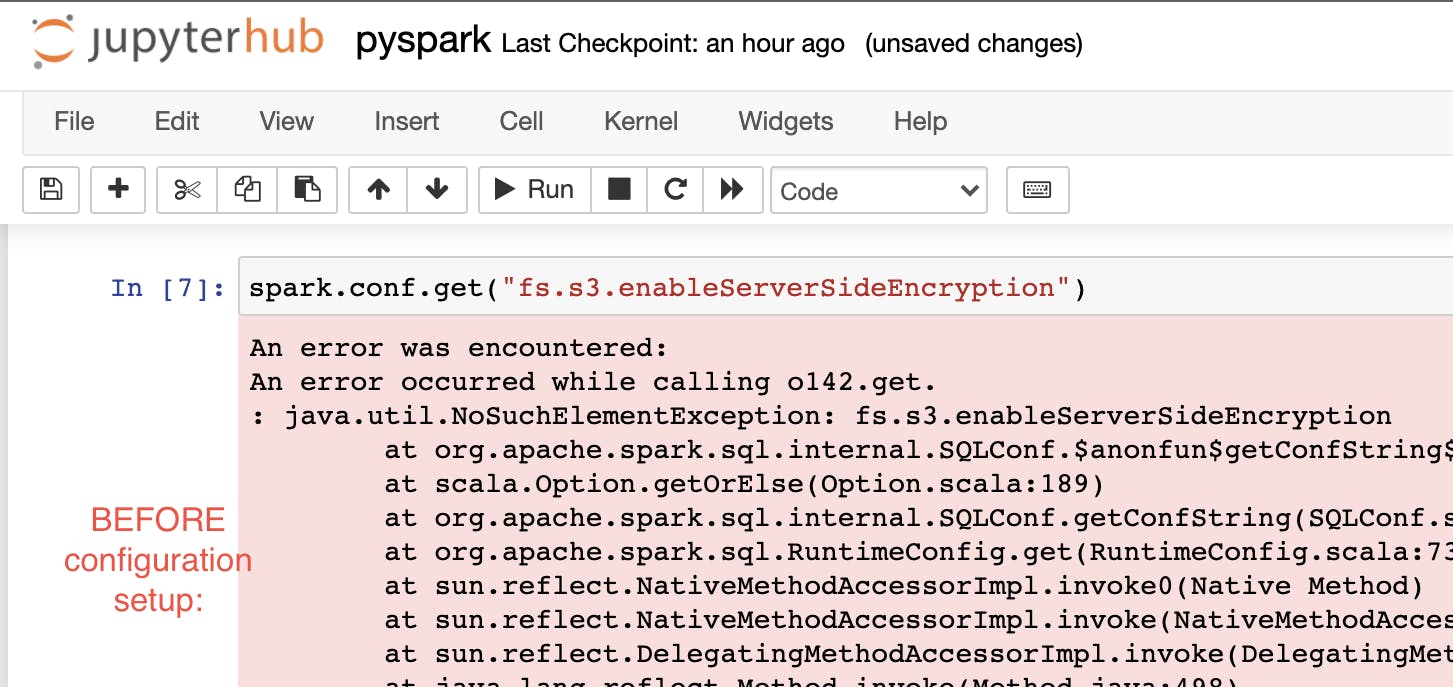
A more flexible way of getting your data encrypted would be to specify the desired configuration in the Jupyter kernel itself. Be aware that you need to setup this option everytime you start a new Jupyter Kernel. And if this option is not set, then the kernel will throw you a NoSuchElementException if you try to access the configuration.

The option you need to add to ensure your data will be encrypted is as follows:
    spark.conf.set("fs.s3.enableServerSideEncryption", "true")
    spark.conf.set("fs.s3.serverSideEncryption.kms.keyId", "MyKMSKeyId")
where spark -> runtime SparkSession,
fs -> EMRFS properties
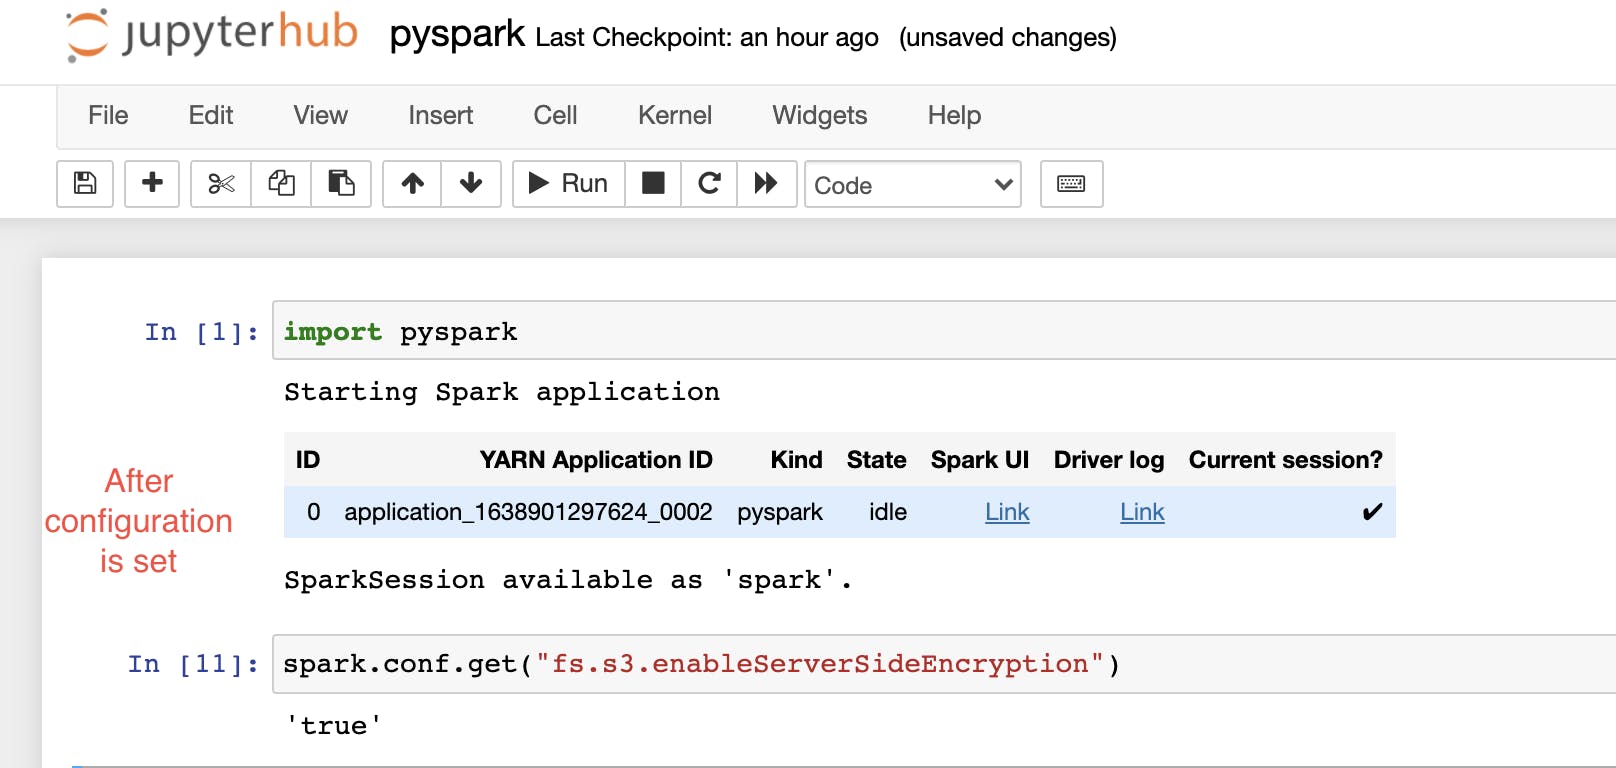
Once this option(configurations) has been set, the same command can be used to validate the presence of an encryption configuration.

In this figure, we encrypted our data via SSE-KMS, you can also other encryption methods. But keep in mind that you cannot use more than one encryption method in the same kernel at the same time. However, you can change your encryption method at runtime in the kernel (more information on this).
One other important point to note is that there is a difference between SparkContext configurations (available via
_sc) and spark runtime configurations. You won’t get your PySpark configurations (the ones that were defined using thesparkvariable) via the following command ->sc._conf.getAll(), wheresc-> SparkContext. The only way you can set/unset or view spark runtime configuration is throughspark.conf(). This is PySpark’s configuration API and these settings are automatically propagated to Hadoop during I/O operations. That’s how the file system knows you want to encrypt the objects uploaded.
To encrypt your data via SSE-S3 (using AWS managed S3 keys) is as follows:
spark.conf.set("fs.s3.enableServerSideEncryption", "true")
spark.conf.set("fs.s3.serverSideEncryptionAlgorithm", "AES256")
As you can probably guess, this configuration doesn’t require you to mention a key file because this is managed by AWS itself. After uploading the file, you can verify it in your AWS console by clicking on the file and checking the encryption configuration. The following setting will appear for your file if it is encrypted via SSE-S3.

Reading Encrypted data via the Jupyter Kernel
Reading from S3 buckets where the data is encrypted is fairly simple. You don’t have to specify your key while decryption. This is because S3 reads the encryption settings, sees the key ID, sends off the encrypted symmetric key to AWS KMS, asking for that to be decrypted. If the user/role has sufficient permission, S3 gets the key back, decrypts the file and returns it. So for an encrypted file, reading the file can be done by using the following command :
spark.read.csv("s3://bucket_name/key/filename.csv",header=True)
However, you cannot read encrypted data from a file if the IAM role attached to your cluster doesn’t have the permissions to access the KMS keys and the bucket. In our scenarios (SSE-KMS and SSE-S3) we have already created these permissions beforehand. In case you want that flexibility of being able to encrypt/decrypt at your service, go for Client-Side Encryption. The key differences are, as already mentioned, is the flexibility, ease-of-use and type of security (what type of encryption you choose depends on your use case).
Some other points you need to take care for successful encryption
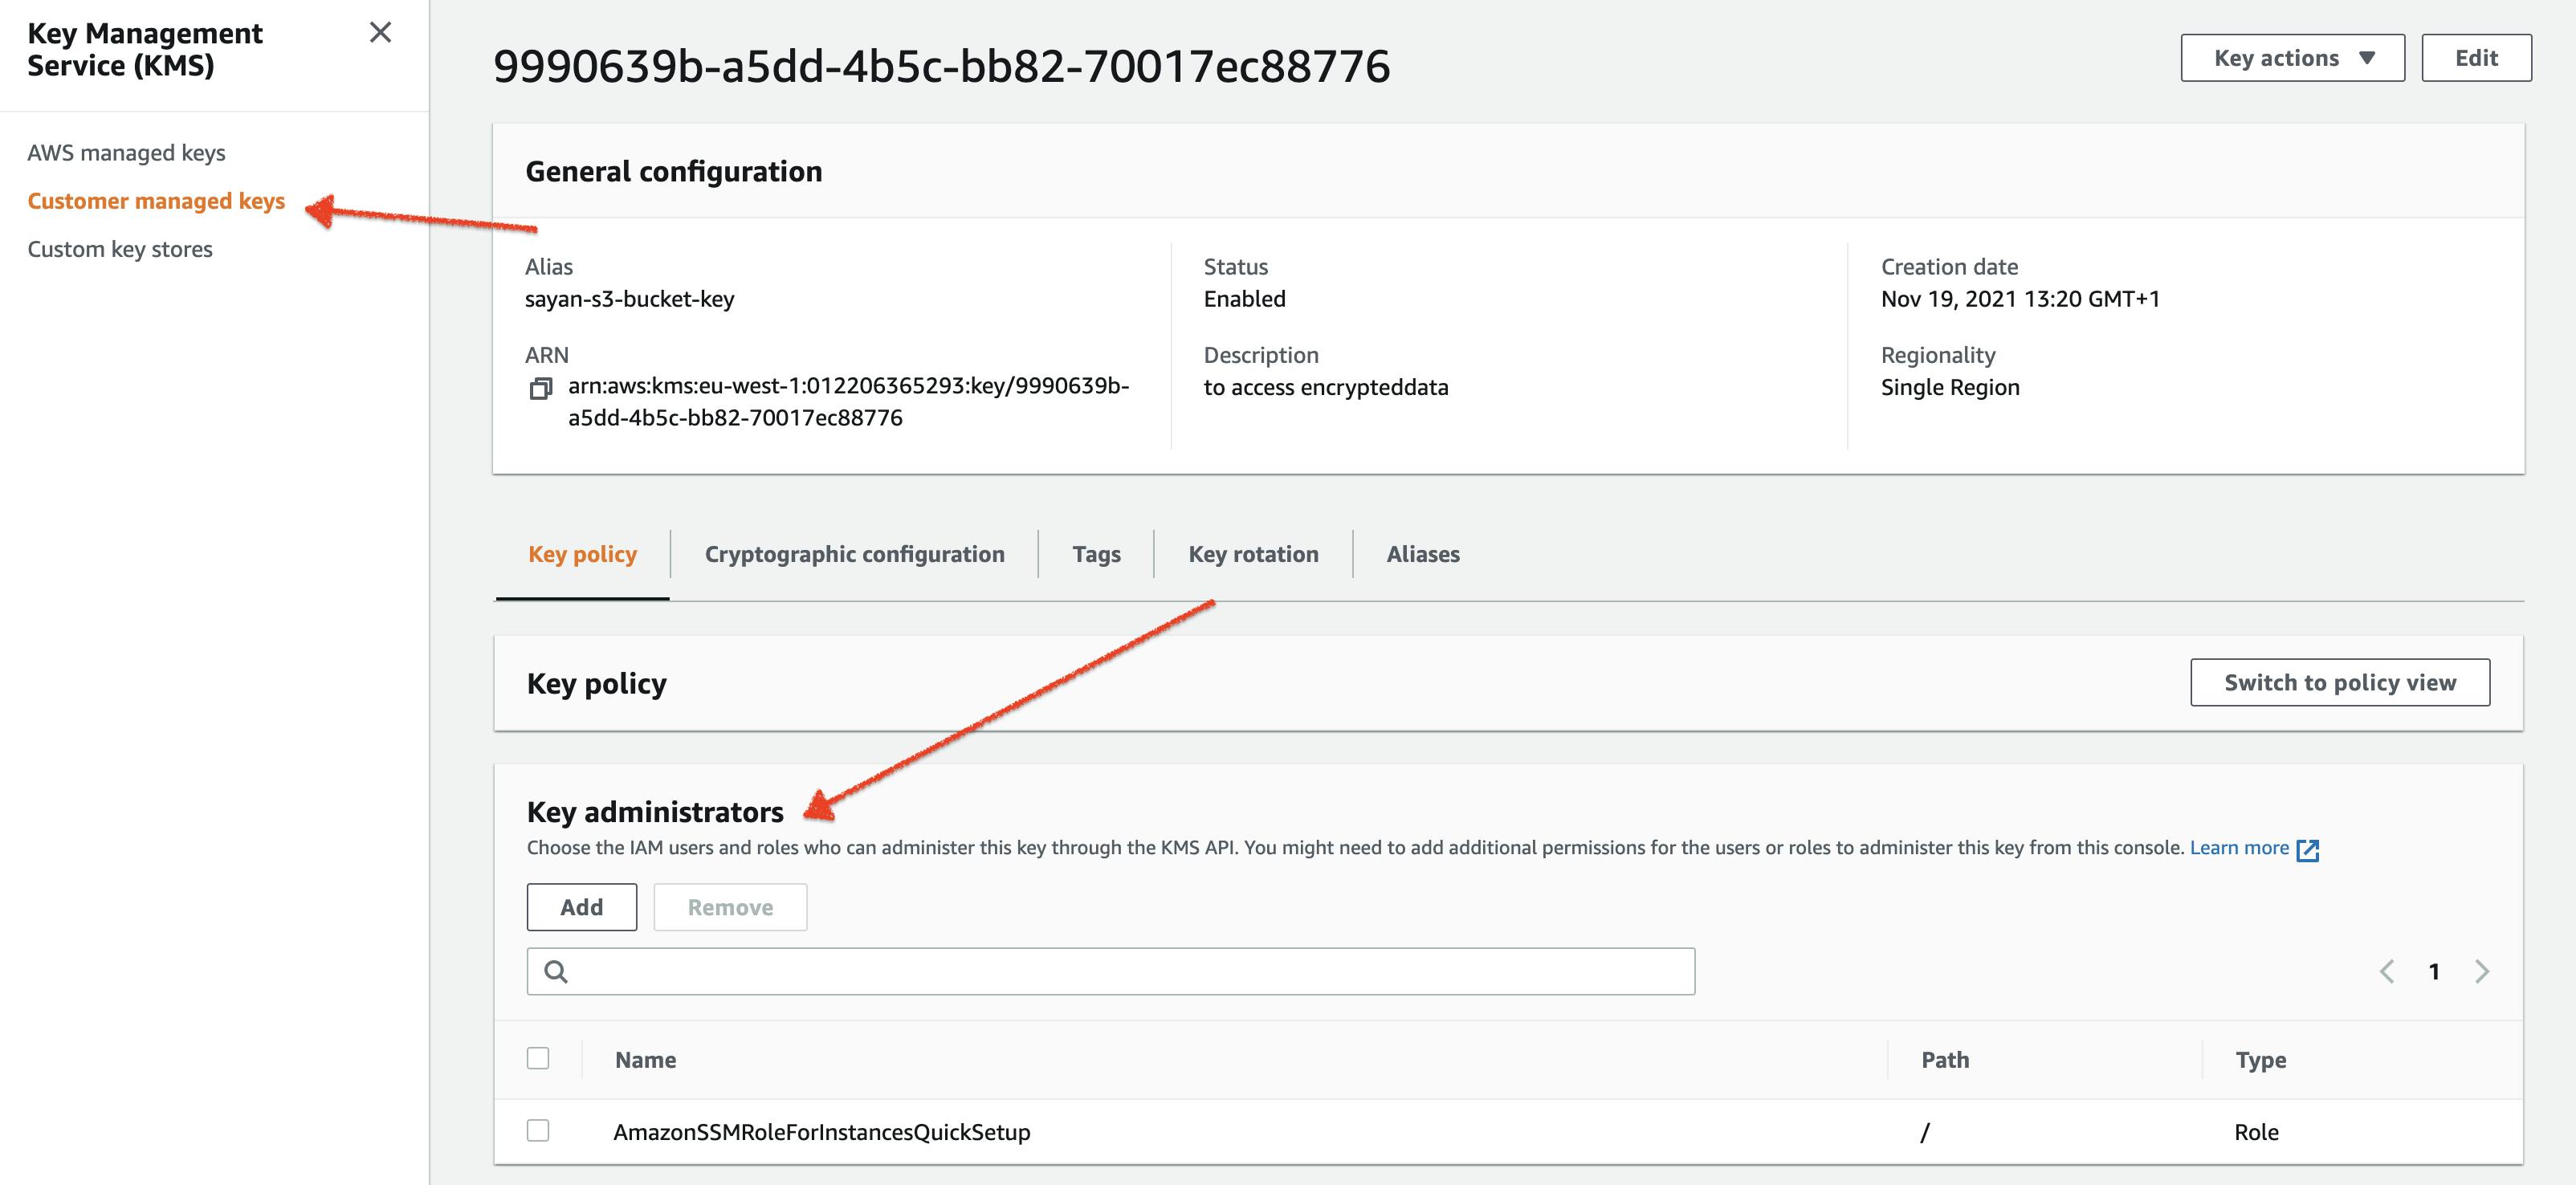
When you spin up an EMR cluster you can specify an EC2 instance profile (default or custom). This instance profile should have the permission to access the KMS key that you want to encrypt/decrypt with. If you choose your KMS key in AWS KMS, make sure that the key administrator field is populated with the IAM role for the EC2 instance profile. The EC2 instance profile should have permission to access the key.

The spark configuration you use on the Jupyter notebook has the same lifespan as the kernel. So, if your kernel dies your spark configurations are lost. Restarting the kernel would also require you to set up those configurations again. Alternatively, if your write or read commands fails with the KeyNotFound exception, it means something is wrong with the configuration you have set. So restart your kernel and check your spark configuration using
spark.conf.get(‘key’)where the key is the name of the configuration.There is a way to change your spark configuration at runtime. This involves using the
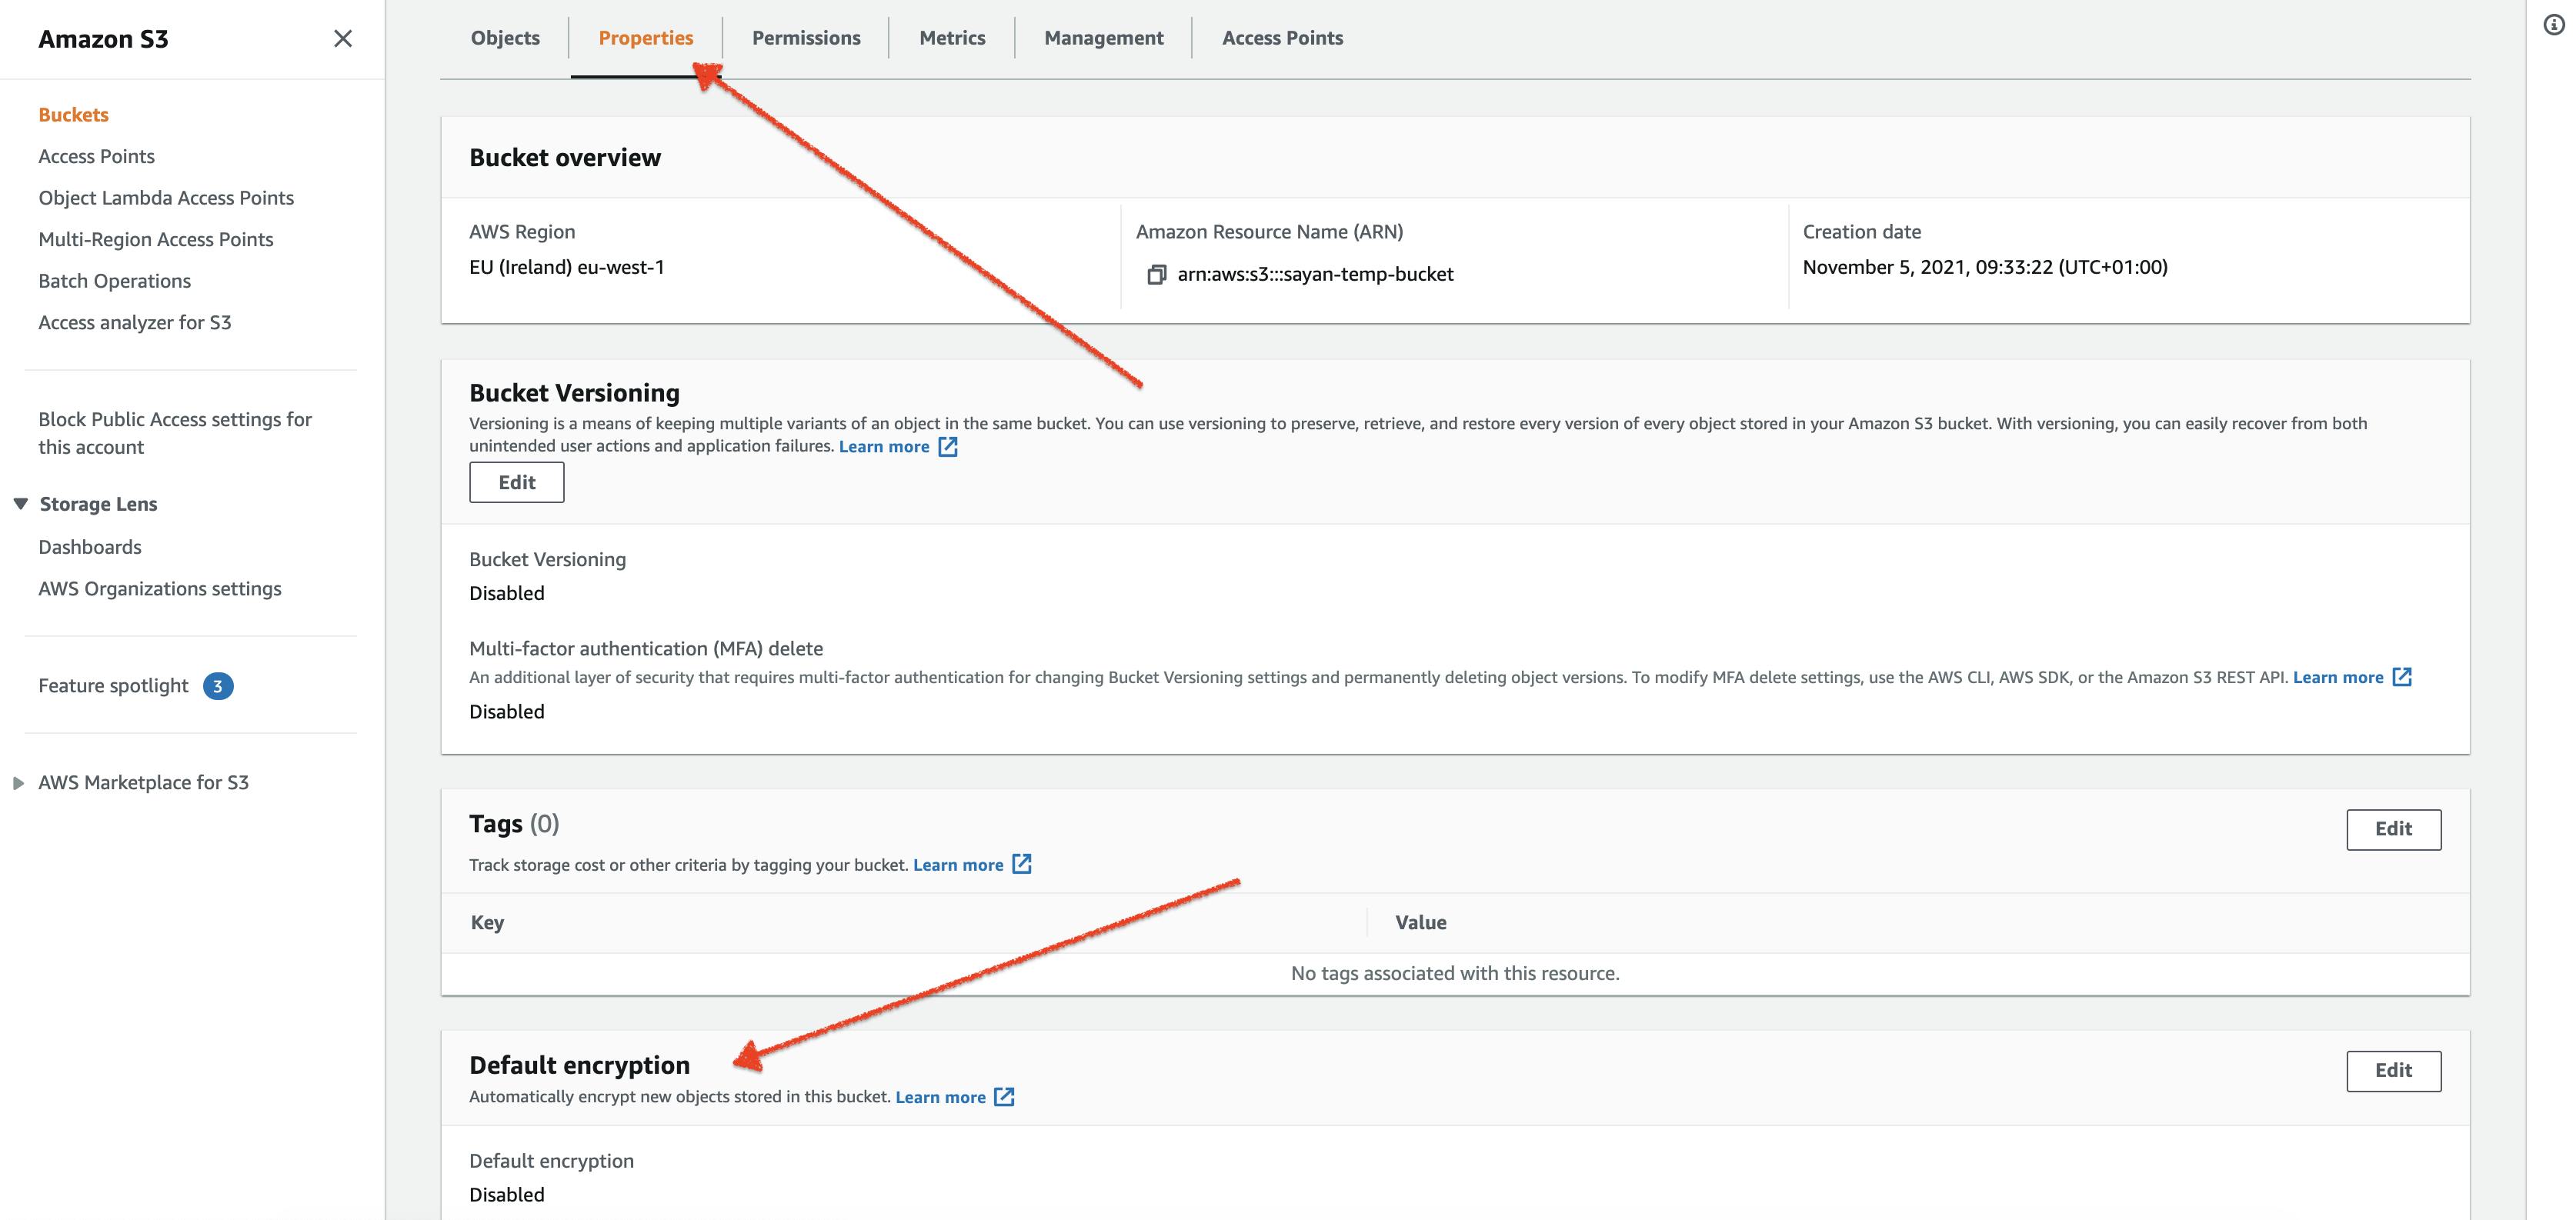
unset()function for the configurations you have set. For instance, suppose if you had configured to use SSE-KMS and you want to use SSE-S3 now, then the following commands will unset the encryption. Once this is done, you can use theset()function previously mentioned to encrypt the file via SSE-S3.spark.conf.unset("fs.s3.enableServerSideEncryption") spark.conf.unset("fs.s3.serverSideEncryption.kms.keyId")Additonally, we can enforce encryption any object you want to upload to an S3 bucket. This option can be enabled both from the ec2 instance and from the AWS console. From the AWS console, go to the bucket configurations, select properties, and then default encryption. But this affects only the new objects you upload (old objects in the bucket remain unaffected).

From the ec2 instance, it is slightly more complicated as you need to edit the properties in
hadoop/etc/hadoop/core-site.xml(more information about this).
Conclusion
In this blog post, we’ve provided a method to read/write encrypted data in S3 buckets using the Jupyter Kernel. We also mentioned some other ways to use your cluster configuration and Hadoop configurations to set up the same thing. Additionally, we have mentioned some key takeaways from our experiment with encryption using configurations and provided some answers to common problems you could face while carrying out this process. We hope you have enjoyed the post. Please feel free to reach us if you have any questions/feedback.

